Introduction
Electrical wiring is one of the most important systems in any home or building. It powers lights, appliances, outlets, and modern electronic devices that we rely on every day. However, wiring can develop problems over time due to aging, moisture, poor installation, overloading, or accidental damage. When these issues occur, knowing basic wiring repair tips can help homeowners identify minor problems and understand when professional assistance is necessary.
For beginners, electrical work may seem intimidating. The thought of dealing with wires, circuits, and electricity often raises concerns about safety. Fortunately, learning the fundamentals of wiring repair can make the process much easier and safer. Understanding how wiring systems function allows you to recognize warning signs, perform simple troubleshooting tasks, and prevent expensive repairs in the future.
This guide provides practical wiring repair tips designed specifically for beginners. You will learn what wiring repair is, why it matters, the tools required, step-by-step repair procedures, common mistakes to avoid, potential risks, and expert recommendations. Whether you are dealing with a loose outlet, damaged wire insulation, flickering lights, or faulty connections, this comprehensive guide will help you approach electrical repairs with confidence while prioritizing safety at every stage.
What is Wiring Repair?
Wiring repair refers to the process of identifying, fixing, replacing, or restoring damaged electrical wires and connections within a building's electrical system. The purpose of wiring repair is to ensure safe and efficient electricity flow throughout the property.
Electrical wiring may deteriorate due to age, heat, moisture exposure, rodents, physical damage, or excessive electrical loads. When wiring becomes damaged, it can lead to flickering lights, power interruptions, tripped breakers, electrical shocks, or even fires. Repairing wiring involves diagnosing the problem and implementing the correct solution.
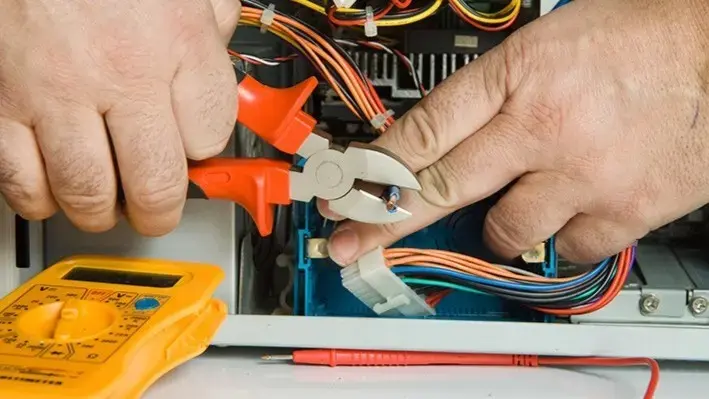
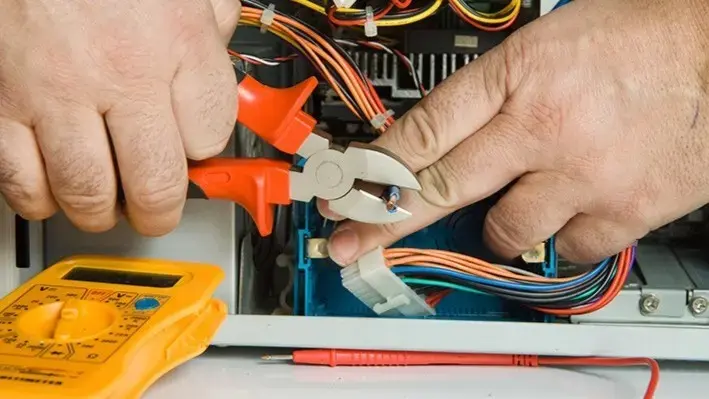
Basic wiring repairs may include replacing damaged wire insulation, tightening loose connections, repairing faulty outlets, replacing switches, or installing new wire sections. More advanced repairs often require professional electricians, especially when dealing with circuit panels or major electrical systems.
Understanding wiring repair helps homeowners recognize potential hazards early and maintain a safer living environment.
Why is Wiring Repair Important?
Electrical wiring serves as the foundation of a home's power distribution system. When wiring problems are ignored, minor issues can quickly develop into serious safety hazards. Proper wiring repair ensures reliable electrical performance while reducing the risk of accidents.
Faulty wiring is one of the leading causes of electrical fires in residential properties. Damaged insulation, overloaded circuits, and loose connections generate heat that can ignite nearby materials. Timely repairs help prevent these dangerous situations and protect lives and property.
Regular wiring maintenance and repair also improve energy efficiency. Damaged wires and poor connections can cause power loss and increased electricity consumption. By addressing problems promptly, homeowners can reduce energy waste, lower utility bills, and extend the lifespan of electrical devices and appliances.
Detailed Step-by-Step Guide
Step 1: Understand Basic Electrical Safety
Before attempting any wiring repair, safety should always come first. Electricity can cause severe injury or death if handled improperly.
Wear insulated gloves and safety glasses whenever working near electrical components. Keep your work area dry and free from water. Avoid touching exposed wires with bare hands.
Always assume a wire is live until you verify otherwise using a voltage tester.
Step 2: Gather Essential Tools
Having the right tools improves both safety and efficiency.
Common tools include:
- Voltage tester
- Wire stripper
- Screwdrivers
- Electrical tape
- Wire connectors
- Needle-nose pliers
- Flashlight
- Insulated gloves
- Utility knife
- Multimeter
Using proper electrical tools helps reduce mistakes and ensures secure repairs.
Step 3: Turn Off Power
Locate the circuit breaker that controls the affected area.
Switch the breaker to the OFF position before beginning any repair. After turning off the power, use a voltage tester to confirm that no electricity is flowing through the wires.
Never skip this step. Verifying power shutdown is one of the most important safety practices.
Step 4: Inspect the Problem Area
Carefully examine the wiring and surrounding components.
Look for:
- Burn marks
- Melted insulation
- Loose connections
- Frayed wires
- Corrosion
- Damaged outlets
- Cracked switches
Visual inspection often reveals the source of electrical problems.
Step 5: Identify the Type of Damage
Different wiring issues require different repair methods.
Common wiring problems include:
- Loose wire connections
- Broken wires
- Damaged insulation
- Corroded terminals
- Faulty switches
- Defective outlets
Correctly identifying the issue prevents unnecessary repairs and improves troubleshooting accuracy.
Step 6: Repair Damaged Wire Insulation
If the conductor itself is intact but the insulation is damaged, repair may be straightforward.
Wrap high-quality electrical tape around the damaged section. Ensure complete coverage and overlap the tape layers for added protection.
For larger damaged sections, consider replacing the wire entirely rather than relying solely on tape.
Step 7: Fix Loose Connections
Loose connections are among the most common electrical issues.
Disconnect the wire, inspect it for damage, and reconnect it securely. Tighten terminal screws firmly without overtightening.
Loose connections generate heat and can eventually lead to electrical fires if left unresolved.
Step 8: Replace Damaged Wire Sections
If a wire is severely damaged, replacement is often the safest solution.
Cut out the damaged portion using wire cutters. Strip approximately half an inch of insulation from each end and reconnect the wires using approved wire connectors.
Ensure connections are tight and properly insulated before restoring power.
Step 9: Repair or Replace Faulty Outlets
Outlets can wear out over time.
Signs of outlet problems include:
- Sparks
- Burning smells
- Loose plugs
- Discoloration
- Intermittent power
Disconnect the outlet, inspect the wiring, and replace the outlet if necessary. Match the replacement outlet with the correct voltage and amperage rating.
Step 10: Check Switches and Fixtures
Faulty switches often cause flickering lights or inconsistent operation.
Remove the switch cover and inspect the wiring connections. Tighten loose wires or replace defective switches when needed.
Ensure all connections are secure before reinstalling the switch.
Step 11: Test the Repair
After completing repairs, restore power at the circuit breaker.
Use a voltage tester or multimeter to verify proper operation. Check outlets, switches, and fixtures to ensure the issue has been resolved.
Monitor the repaired area for unusual heat, smells, or performance issues.
Step 12: Maintain Regular Inspections
Preventive maintenance reduces future electrical problems.
Inspect visible wiring periodically and watch for signs of deterioration. Address small issues before they become major repairs.
Routine inspections help maintain a safer and more reliable electrical system.
Benefits of Wiring Repair
- Improves electrical safety
- Reduces fire hazards
- Prevents electrical shocks
- Enhances energy efficiency
- Lowers electricity costs
- Increases system reliability
- Extends appliance lifespan
- Improves power distribution
- Prevents unexpected outages
- Protects valuable electronics
- Maintains property value
- Identifies hidden problems early
- Reduces long-term repair expenses
- Ensures compliance with electrical standards
- Provides peace of mind
Disadvantages / Risks
- Risk of electrical shock
- Possibility of accidental short circuits
- Potential fire hazards if repairs are done incorrectly
- Hidden wiring damage may go unnoticed
- Improper repairs can violate electrical codes
- Incorrect wire connections may damage appliances
- Specialized tools may be required
- Some repairs demand professional expertise
- Mistakes can increase repair costs
- Circuit overload risks may remain unresolved
Common Mistakes to Avoid
Many beginners make errors that can compromise safety and effectiveness during wiring repairs. One common mistake is failing to turn off power before starting work. Even experienced individuals verify power disconnection before touching electrical components.
Another mistake is using the wrong wire size. Electrical systems are designed for specific wire gauges. Using undersized wires can lead to overheating and fire risks. Always match replacement wires to the existing electrical specifications.
Poor wire connections also create problems. Loose connections generate resistance and heat, leading to equipment failure or electrical fires. Ensure all connections are tight and secure.
Using ordinary tape instead of electrical tape is another frequent error. Electrical tape is specifically designed to withstand electrical conditions and provide proper insulation.
Many homeowners attempt repairs beyond their skill level. If a problem involves the main panel, extensive rewiring, or unclear electrical faults, contacting a licensed electrician is the safest option.
FAQs
1. Is it safe for beginners to repair electrical wiring?
Beginners can perform simple repairs if they follow proper safety procedures and work on minor issues. Complex electrical work should always be handled by qualified electricians.
2. What are the signs of faulty wiring?
Common signs include flickering lights, burning smells, frequent breaker trips, warm outlets, buzzing sounds, and visible wire damage.
3. How often should electrical wiring be inspected?
A visual inspection should be performed annually. Older homes may require more frequent professional evaluations to ensure wiring remains safe.
4. Can electrical tape permanently repair damaged wires?
Electrical tape can temporarily protect minor insulation damage, but severely damaged wires should be replaced for long-term safety.
5. When should I call a professional electrician?
Call an electrician when dealing with electrical panels, major rewiring, repeated breaker trips, burning smells, or any issue you cannot confidently diagnose.
6. Why do outlets become loose over time?
Frequent plug insertion and removal gradually wear outlet contacts. Worn outlets may no longer hold plugs securely and should be replaced.
7. What causes circuit breakers to trip repeatedly?
Repeated breaker trips may result from overloaded circuits, short circuits, ground faults, or faulty electrical devices connected to the circuit.
8. Can old wiring increase electricity bills?
Yes. Damaged or inefficient wiring can create resistance and energy loss, reducing system efficiency and increasing power consumption.
Expert Tips & Bonus Points
Professional electricians recommend labeling all circuit breakers clearly. Proper labeling makes troubleshooting and future repairs much easier.
Keep a voltage tester in your toolbox and use it before touching any electrical component. Never rely solely on breaker positions to confirm power shutdown.
Avoid overloading outlets with multiple high-power devices. Excessive electrical demand accelerates wiring deterioration and increases fire risks.
Use high-quality electrical materials and certified components. Cheap connectors, switches, and outlets often fail sooner and create safety concerns.
Inspect areas exposed to moisture regularly. Bathrooms, kitchens, basements, and outdoor installations are more vulnerable to wiring damage and corrosion.
Take photographs before disconnecting wires. Reference photos can help ensure correct reconnection during reassembly.
Consider scheduling professional electrical inspections every few years, especially in older homes. Preventive evaluations often identify hidden issues before they become expensive repairs.
Conclusion
Wiring repair is an essential skill that helps homeowners maintain safe and reliable electrical systems. While electricity should always be treated with caution, understanding basic repair techniques can help beginners identify common problems and address minor issues effectively. From fixing damaged insulation and tightening loose connections to replacing worn outlets and switches, proper repairs contribute significantly to household safety.
The most important aspect of any wiring repair project is safety. Turning off power, verifying circuits with a voltage tester, using proper tools, and following established electrical practices reduce the likelihood of accidents. Equally important is recognizing personal limitations and seeking professional assistance when repairs exceed your knowledge or experience.
Regular inspections and preventive maintenance play a major role in extending the lifespan of electrical systems. Small problems detected early are usually easier and less expensive to fix than major failures. By applying the wiring repair tips outlined in this guide, beginners can develop greater confidence while protecting their homes from electrical hazards.
A well-maintained electrical system delivers reliable performance, improves energy efficiency, and provides peace of mind. With the right knowledge, tools, and safety mindset, wiring repair becomes a manageable and valuable part of responsible home maintenance.